Frigidaire Refrigerator Not Defrosting – 5 Reasons with Solutions!
It’s okay to worry when your refrigerator is not defrosting as it raises the chances of frost build-up, unnecessary energy consumption, termeprature fluctuations, and a long-term damage to your appliance. But why worry when we get you covered?
Maybe your Frigidaire refrigerator has a faulty defrost timer, a damaged defrost temperature sensor, a malfunctioning defrost heater, a defective defrost thermostat, or a faulty defrost control board. These are some common reasons why your Frigidaire refrigerator is not defrosting.
So, what should you do now? Being worried or scroll down to know the solutions? We hope that you choose the second option!
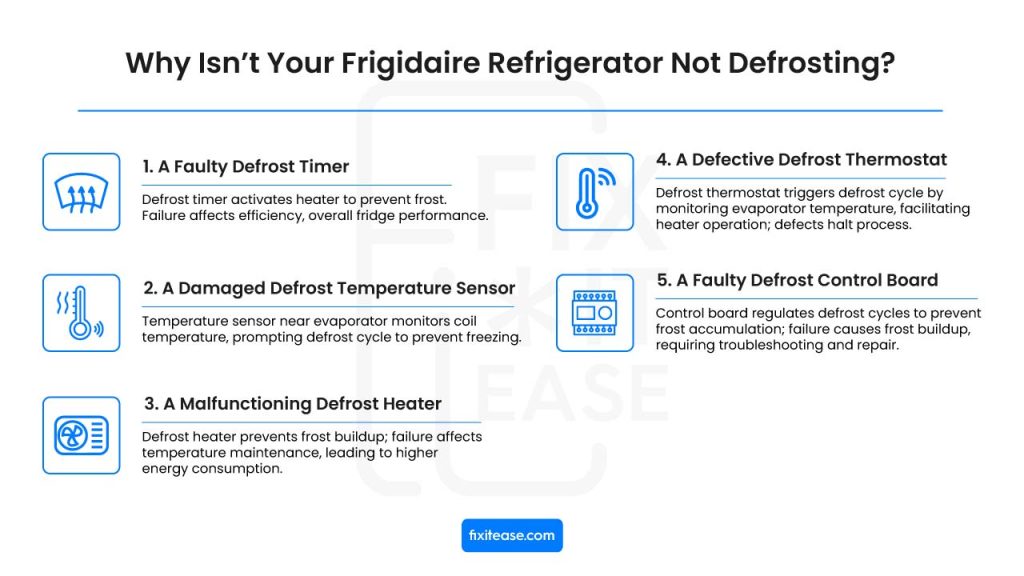
Why Isn’t Your Frigidaire Refrigerator Not Defrosting?
There are some compelling reasons why your Frigidaire refrigerator doesn’t defrost. We’ve covered them in detail here.
1. A Faulty Defrost Timer
The defrost timer is responsible for activating the defrost heater at regular intervals to prevent frost buildup on the evaporator coils.
If the timer fails to advance into the defrost cycle or doesn’t send power to the defrost heater, frost accumulates unchecked and it affects the compressor’s efficiency and overall fridge performance.
What Causes It
Clogging of the air filter is primarily caused by a buildup of dust, debris, and particulates in the filter over time. This accumulation occurs naturally as air circulates through the refrigerator, trapping particles and impeding airflow. It’s a common maintenance issue that can affect the refrigerator’s cooling efficiency.
How to Identify
Identifying a clogged air filter is relatively straightforward. First, locate the air filter housing, typically found in the refrigerator’s interior. Remove the air filter and visually inspect it. If the filter appears dirty, dusty, or clogged, it’s a clear sign that it needs attention.
How to Fix It
- Identifying the air filter’s location within your Frigidaire refrigerator.
- Carefully remove the air filter from its housing.
- Inspect the filter for visible dirt and clogs.
- If the filter is clogged, clean it by either tapping it gently to dislodge loose particles or washing it with mild soap and water.
- Ensure the filter is completely dry before reinserting it into the housing.
- Return the air filter to its original location within the refrigerator.
2. A Damaged Defrost Temperature Sensor
A temperature sensor maintains the temperature status to the control board during the defrost cycle. Located near the evaporator coils, it continuously monitors the temperature of the coils. When these coils get too cold, the sensor signals the control board to activate the defrost cycle, which, in turn, raises the temperature of the coils to prevent freezing over.
What Causes It
Several factors can lead to a damaged defrost temperature sensor. The most common culprits include wear and tear over time, electrical issues, or physical damage. These sensors are sensitive components that can be affected by extreme temperatures or even moisture, leading to their malfunction.
How to Identify
Identifying a damaged defrost temperature sensor requires some observation. If you notice irregular temperature fluctuations within your refrigerator, such as items freezing when they shouldn’t, it might be a sign that the sensor is not functioning properly.
Another telltale sign is excessive ice buildup on the evaporator coils. If you experience these issues, it’s a good indication that your defrost temperature sensor needs attention.
How to Fix It
The good news is that fixing a broken defrost temperature sensor is a relatively straightforward process. You will need a Phillips head screwdriver and a few minutes of your time:
- Locate the sensor near the evaporator coils in your refrigerator and unscrew the head screws that hold it in place.
- Remove the wires from the terminals on the sensor and use a multimeter to test for continuity. If there is no continuity, it’s a clear indicator that you should replace the sensor.
- Reattach the new sensor and test it by setting your refrigerator to its lowest setting and allowing it to run for 24 hours.
3. A Malfunctioning Defrost Heater
A defrost heater plays a critical role in eliminating ice buildup on the evaporator coils. If it fails to function properly, frost accumulation can hinder your fridge’s ability to maintain the desired temperature. Eventually, it can result in higher energy bills.
What Causes It
Wear and tear, electrical issues, or physical damage are some of the common reasons for this issue. Additionally, extreme temperatures or moisture exposure can lead to the heater’s malfunction.
How to Identify
When your freezer compartment has excessive frost buildup, it’s a clear indicator that the defrost heater might be failing. During the defrost cycle, the heater should generate enough heat to melt the ice properly. If it’s not working as intended, you’ll observe frost accumulating on the evaporator coils.
How to Fix It
- Test the defrost heater for continuity using a multimeter. Touch the multimeter probes against the heater’s terminals and check for a normal reading. If the reading is abnormal or there’s no continuity, the heater needs replacement.
- Before proceeding with the replacement, unplug your refrigerator and disconnect any wires connected to the defrost heater.
- The defrost heater is usually located behind the back access panel inside the freezer, under the evaporator coil. If it’s secured by screws, use a Phillips screwdriver to remove them.
- Install the new heater in place of the old one, ensuring all connections are secure.
- Turn the power back on and test the heater. During the defrost cycle, the heater should feel warm if it’s functioning correctly.
4. A Defective Defrost Thermostat
A defrost thermostat monitors the temperature of the evaporator coils. When the coils drop below a set temperature, the thermostat triggers the defrost cycle which allows power to flow to the defrost heater.
In the defrost cycle, the heater’s role is to melt away any frost that has accumulated on the coils. However, if the defrost thermostat is defective, it won’t close its contacts, resulting in no power being supplied to the defrost heater.
What Causes It
If the thermostat is not functioning correctly or if it inaccurately monitors the temperature, it can lead to issues. Checking the power to the heater and the fuse in the sensor can also help pinpoint the problem. Wear and tear over time, electrical problems, or damage can also be a reason for the issue.
How to Identify
If you notice that there is a persistent issue with frost buildup on the evaporator coils, it could indicate a malfunctioning thermostat. During the defrost cycle, the thermostat should trigger the heater to turn on and melt the ice properly. If this is not happening, you may need to inspect the defrost thermostat further.
How to Fix It
- Locate the thermostat inside the fridge and detach it from the wiring harness. It is usually mounted on the control housing in the fresh food section. Unplug the refrigerator from the power source and remove the old thermostat from its housing.
- Insert a new thermostat specifically designed for your refrigerator model into the housing. Ensure it is correctly positioned, ideally at the same spot where you found the old thermostat, so it can accurately sense the temperature inside the fridge.
- Plug the refrigerator back in and turn it on.
5. A Faulty Defrost Control Board
A defrost control board etermines how often the defrost cycle runs, ensuring that frost and ice do not accumulate excessively on the evaporator coils.
However, when the control board fails, the refrigerator won’t initiate the defrost cycle, leading to frost buildup. Let’s explore what a faulty defrost control board means, the reasons behind it, how to identify the issue,and how to fix it.
What Causes It
Normaly wear & tear and different electronic issues cause a defrost control board to work improperly. Modern refrigerators often feature electronic control boards that manage defrost cycles, and these boards can malfunction due to various reasons, disrupting the defrosting process.
How to Identify
If you notice that there is persistent frost or ice accumulation in the freezer compartment and you’ve confirmed that the defrost heater and thermostat are working correctly, the control board may be the reason. Inspect the control board for any burn marks, cracks, warps, or other distortions. If you find any damage, it’s a strong indicator that the control board is defective.
How to Fix It
- Before replacing the defrost control board, it’s essential to first test the defrost heater and defrost thermostat to ensure they are functioning correctly. If these components check out, the control board is likely the issue.
- To replace the control board, you may need to access it, which is typically located in the refrigerator section near the temperature controls behind plastic panels. In some cases, it may be mounted on the back of the refrigerator.
- Once you’ve located the control board, remove the damaged or defective board and install the new control board in its place.
- Ensure that the new control board is securely in position.
- Reassemble any panels or components you removed to access the control board.
What’s the Right Way to Defrost a Frigidaire Refrigerator?
If you find it difficult to defrost a Frigidaire refrigerator, we’ll help you out with that.
Regular Defrosting
- Step 1: Unplugging your Frigidaire refrigerator from the power source. This ensures your safety during the process and prevents any electrical mishaps.
- Step 2: Locate the two thermostat dials. These dials control the temperature settings for both the refrigerator and the freezer. In Frigidaire side-by-side models, you can usually find these dials on the refrigerator side, along the top edge of the appliance.
- Step 3: Find the temperature dial labeled “Freezer.” This dial specifically controls the freezer’s temperature.
- Step 4: Turn the freezer temperature dial to zero. By doing this, you effectively turn off the compressor, halting the cooling process. It’s important to note that the lights inside the refrigerator will stay on during this step, as it doesn’t cut off power to the entire appliance.
- Step 5: Listen for a distinctive “click” sound. This sound indicates the initiation of the defrost cycle. Allow the defrost cycle to run for approximately 30 minutes.
- Step 6: After the 30-minute defrost cycle is complete, reset the freezer temperature dial to your preferred setting. This step ensures that the appliance begins cooling again, and your food stays fresh.
When to Force Defrost Your Refrigerator? How to Do It?
Sometimes, you may need to force a defrost if the automatic system malfunctions or fails to respond. Forcing a defrost can be done manually or by using the refrigerator’s light switch. But why should you consider this option?
The primary reasons for defrosting are to increase the freezer’s efficiency and reduce energy consumption. Accumulated ice can affect the quality of your food items and occupy valuable space, compromising the freezer’s performance and increasing electricity costs.
Here’s how to force a defrost on your Frigidaire refrigerator.
Mechanical Timers:
- Open the freezer door. Locate the timer screw, which is typically found within the freezer compartment.
- Use a flathead screwdriver to turn the timer screw clockwise slowly. Keep turning until you hear a distinct click sound. This indicates that the defrost mode has been activated.
Electronic Timers
- Open the door to the freezer compartment.
- Locate the temperature control panel where you set your freezer’s temperature.
- If your Frigidaire freezer control panel features an ON/OFF button, press and hold the button for about three seconds to turn off the cooling system. If your freezer has a control knob, turn it to the zero position.
FAQs
How do I test my Frigidaire defrost thermostat?
First off, unplug your refrigerator for safety. Locate the defrost thermostat, usually positioned on the evaporator coil or behind the freezer’s rear panel.
Using a multimeter, check for continuity by disconnecting the wires and measuring resistance. A reading close to zero ohms indicates proper functionality, while no continuity suggests it’s time for a replacement. This quick test helps ensure your defrost thermostat is working effectively to prevent frost buildup in your freezer.
How do I know if my fridge is defrosting?
You can tell if your fridge is defrosting by paying attention to a few key indicators. First, listen for a subtle hissing or sizzling sound coming from the freezer area, which signals the melting of accumulated frost.
Additionally, you might notice water droplets or small pools of water in the fridge or freezer. Finally, the fridge should feel slightly warmer during the defrost cycle, but this should be temporary, and it will return to its usual cooling state once defrosting is complete. These signs confirm that your fridge is actively defrosting and maintaining its efficiency.
Wrapping Up
In conclusion, when facing the issue of a Frigidaire refrigerator not defrosting, make sure you troubleshoot the problem promptly.
Start by checking the defrost timer, heater, and thermostat to identify any faulty components. Regular maintenance, like cleaning coils and ensuring proper airflow, can prevent future occurrences. If unsure about the diagnosis or repair, seeking professional assistance is a wise choice to restore your refrigerator’s optimal performance.